Note: All content is original and designed by Custom Bag Patterns.
Materials needed:
1 yard (1 meter) of outer fabric (nothing with stretch, denim, drill, etc.)
1 yard (1 meter) of fabric for lining, either contrasting or complimenting (i.e cotton, a soft polyester)
2 small D rings or round wooden rings
1 magnetic snap
Thread of matching or contrasting color
Depending on what fabric you use for the outer part of the bag, you might want 1 meter of interfacing, iron-on or not. I used a light weight fabric for the bag in the photos, so I used a stiff iron-on interfacing.
Step 1:
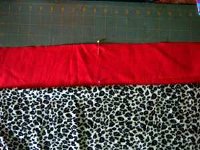
Cut your front and back panels of outer fabric, 13.8″ H x 19.7″ W (35cm H x 50cm W). (See pic 1)
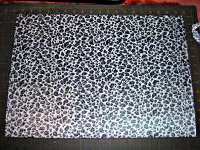 (Pic 1)
Step 2:
Cut a 2″ x 2″ (5cm x 5cm) square (pic2) out of each of the bottom corners (pic 3)
(Note: If using iron-on interfacing, iron it on before marking and cutting box seams.)
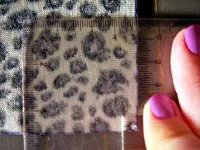
(Pic 2)
(Pic 3)
Repeat steps 1 and 2 for lining.
Step 3:
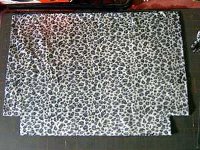
Cut your handle 35.4″ L x 3.5″ W (90cm long x 9cm wide). (See Pic 4) I cut two tabs 2.8″ x 2.4″
(7cm h x 6cm w). The tabs are for attaching the D rings or round wooden rings.
 (Pic 4)
Assembling:
Step 1:
Take the front and back panels of both outer fabric and lining fabric and fold in half, along the top, and mark the middle with a straight pin. (See pic 5)
 (Pic 5)
Step 2:
On lining, mark 4/5″ (2cm) down for placing of magnetic snap on both panels. (Pics 6 & 7)
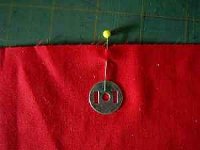 (Pic 6)
 (Pic 7)
Open these marks with scissors by folding the marks in half and barely snipping them.
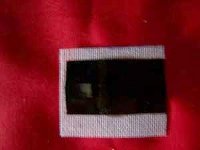
Step 3:
Install the snap. I used a small piece of interfacing between the the snap back and the fabric, I find it protects the lining material. (See pics 8 & 9)
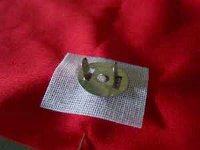 (Pic 8)
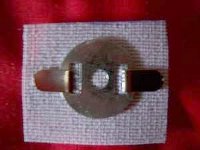 (Pic 9)
I also used a bit of electrical tape to protect the outer fabric. (See pic 10)
 (Pic 10)
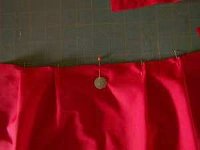
Step 4:
Using the pin in the middle, evenly space two, 2/5″ (1cm) pleats. (Pic 11)
Do this for the other panels.
 (Pic 11)
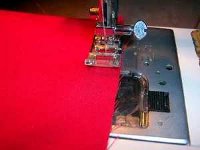
Step 5:
With right sides together, sew front and back panels together. (Both outer and lining) (pics 12 & 13)
 (Pic 12)
 (Pic 13)
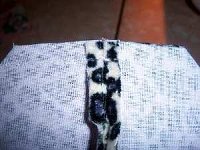
Step 6:
Matching up the seams, sew the corners to form the box seam. (Pic 14)
 (Pic 14)
Now you have two bag shells.
Step 7:
With right sides together, pin the shells together, place the tabs with D rings/round wooden
rings at the side seams. Sew together, leaving an opening, in front or back, for turning. Here’s what it looks like after its turned. (Pic 15)
 (Pic 15)
This is the opening pinned for sewing (Pic 16)
 (Pic 16)
After turning top stitch around, giving your bag the completed look and closes the opening.
Step 8:
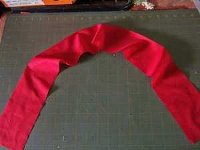
Fold your fabric for you handle in half length wise and sew down the long side. Then, using a safety pin, turn. (Pic 17)
 (Pic 17)
Top stitch to finish. (Pic 18)
 (Pic 18)
Last step: Tie the handle to the D rings or round wooden rings. Or you can sew them on.
Your bag is finished!! (Pic 19)
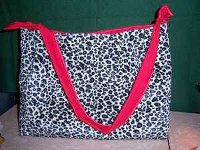 (Pic 19)
This pattern is for personal use only. Please do not sell the finished product, as I already sell this bag as my own. If you would like a modified version, please contact me via my site,www.custombagpatterns.com. Thanks!!!
All copyrights reserved. Custom Bag Patterns. Copyright © 2011